Temperature


Monday, August 13, 2012

Aquaponics

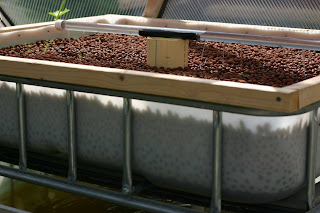
IBC Tote Aquaponics

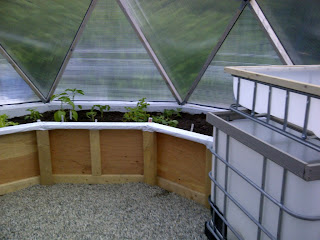
The aquaponics system is up and running now. Water is pumped from the bottom fish tank into the grow bed on top.

Aquaponics PVC Spray Bar

The grow bed is filled with 250 liters Hydroton clay ball grow media. It takes about 5 minutes for the pump to fill the grow bed with water, then the bell siphon kicks in and empties it back to the fish tank.

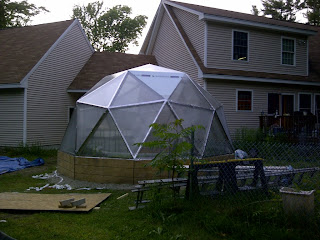
Geodesic Dome Greenhouse

Geodesic Dome Vents

A couple updated pictures of the dome with all the panels re-installed. 


A neat shot of the dome at night.


Wednesday, August 1, 2012

Windows and Data Logging

I added a Digi Watchport USB Temperature and Humidity Sensor and wrote a VB application to poll the device every 10 minutes and put the data into a MySQL database. I set up the JpGraph PHP script on my home server to supply the live graphs at the top of the blog.

 The windows are now built and installed. I added the 2 automatic vent openers I got off ebay and they work great. The openers start to push the windows open at about 70 degrees.

Automatic Dome Vent Opener

Geodesic Dome Vent Opener


Sunday, July 8, 2012

Irrigation

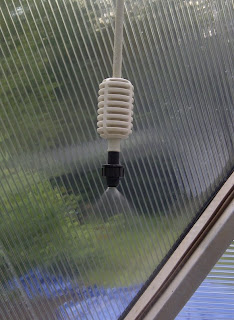
The watering system is installed now. I used 1/2" feed line around the base of the grow beds, punched holes to install misters heads with 1/4" tube. I adapted my mister heads to some neat weighted feed lines they had at Griffins Greenhouse Supplies so they hang nice and straight.

Geodesic Dome Plant Mister

There is a lot of water getting into my panels when it rains so I am tearing them all back off to add some sealing tape. I will use foil tape folded over the top edge of each panel and a breathable tape on the bottom edge. When I put them back on I put a small square of bituthene on both sides of the panel where the mounting screws were. All the seams will be covered with 2.5" strips of bituthene and on top of that I will put 3" foil tape. 

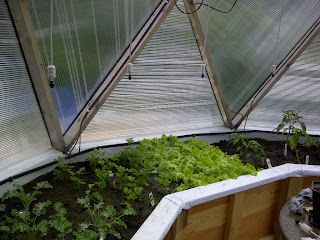
Geodesic Dome Irrigation

Timer turns the misters on for an hour each day at noon.


Sunday, June 17, 2012

First Plants

This is the third day of cutting and installing the polycarbonate. All the panels are on and taped except the two that will be hinged to to open for ventilation.

Geodesic Dome Greenhouse

Geodesic Dome Door

First plants are in the grow beds.

IBC Tote aquaponics tank


Friday, June 15, 2012

Polycarbonate Day 1

I picked up a pile of 16 foot long twin wall poly carbonate sheets from Griffins Greenhouse Supplies. The material cuts easy. You turn the circular saw blade around backwards so it doesn't crack the poly. The only problem was all the dust ends up between the two walls inside the small channels. I had to use an air compressor to blow all the poly dust out of each channel after cutting.


So far I have got 25 triangles of the dome cut out. I got 5 put up today before it was too dark to work anymore. I am using glazing tape on the inside to stick the sheets to the wood 2x4's then 9 washer head screws on each panel to hold them on. I will tape all the seams with Butyl backed Foil tape.


Friday, June 1, 2012

Filled Grow Beds

Heat pipe was put in the grow beds. I will install fans in the boxes beside the door pulling warm air from the intake ports next to the water tank.


I got a delivery of 7 yards of soil for the grow beds this week from Gorham Sand and Gravel. The driver was great, he backed the truck around my house and dumped the dirt right next to the dome. We all shoveled it in tonight, it took about 6.5 yards to fill the beds.


Sunday, May 27, 2012

Grow Beds

Here is the floor plan for the grow beds I drew up in AutoCAD. The open spot is where I plan to put a 330 gallon IBC tank. I will be cutting the top off the IBC tank to make an aquaponics section in the greenhouse.


The grow beds are all framed in now and held in place with some nice rough cut 4x4's from The Board Barn. I put panda film on all the walls to protect the wood. The outside facing walls are all double insulated with ploy covered fiberglass insulation. In the center I put down a layer of weed barrier fabric with some sand then finished the floor with stone dust from Durgin Sand and Gravel.


Friday, May 4, 2012

Door Framed in and Installed

I finished framing in the door and got it installed. Outside sheathing on the 2' walls is now complete. I will have to take out some pieces if I decide to put a water tank in I guess. I have been searching around for an IBC tank but have not found one at a fair price yet.


Sunday, April 22, 2012

Begin Construction

I used a 2" aluminum pipe that I cut into 3.5" lengths for the hubs. Metal strapping will go through the center of the pipe and 2 wood screws will hold it together on both sides of the 2x4 beams.


Dome construction started in the garage until it got too large. Then we moved the operation to the back yard.


The base was set on concrete blocks at each corner then the two half dome sections were placed on top.


Dome Design and Model

My dome was designed at  http://acidome.ru/lab/calc/ 
This site is in German but translates fine. I went with a 2v dome with piped hubs and I will put a 2' wall under it.

To understand how it would all go together and how I would frame out the door I built a 1/10 scale model of the dome over the winter.